Build Goal-Based Incentive Plans
Incentive plans in nCino Incentive Compensation can be used to pay a flat amount to an employee once they reach a target volume or number of units in certain date range. This article details how to build a goal-based incentive plan.
Setting Up
To set up a goal-based incentive plan, ensure the following options are set on the plan:
-
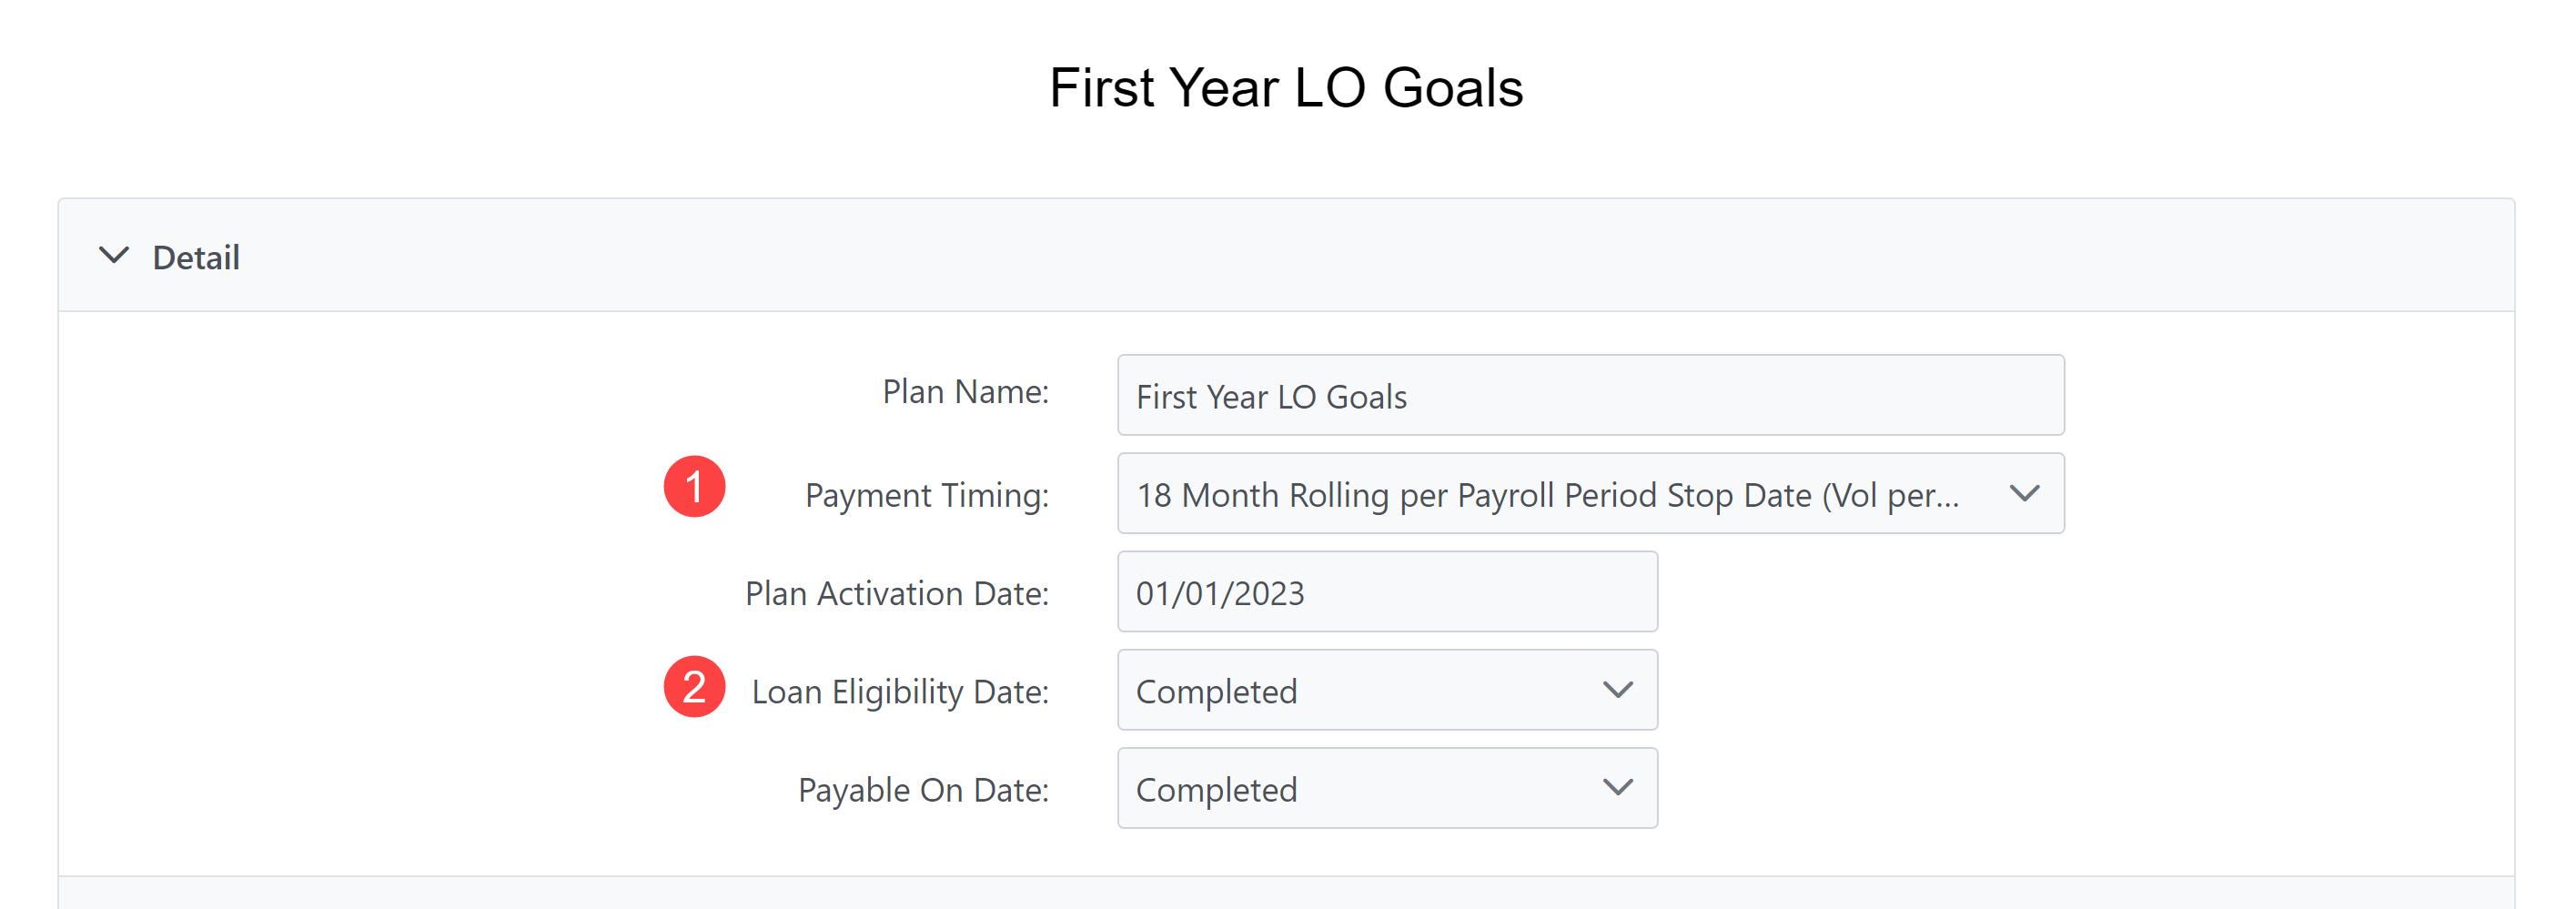
Payment Timing: 18 Month Rolling per Payroll Period Stop Date (Vol per 18 Months; Pay per Payroll Period)
-
Allows you to calculate using volume over an 18-month period.
-
-
Pay Unit: Flat $ Amount
-
The flat $ amount paid to the employee. Will show as being evenly spread across all qualifying loans.
-
-
Tier Type: One of the following: Units, Vol, Units OR Vol, Units AND Vol
-
These represent the goals the plan is built for. The employee is aiming for a specific number of units, a specific amount of volume, etc. for a specific date range.
-
-
Tier Levels: Must be set up as follows:
-
Tier 1: Flat $ Amount = [Amount for achieving goal]
-
Tier 2+ (if used): Flat $ Amount = [Amount for achieving additional goal(s)]
-
-
Inactive Date: If the goal is only valid for specified amount of time (less than 18 months), enter an inactive date for when it no longer applies.
Administering Goal-Based Plans
Once the final tier of the plan has been met (meaning all goals on the plan have been achieved), the plan will no longer pay additional compensation to the employee.
The "Flat $ Amount" is redistributed across the pool of loans as new loans are added. This will continue until the plan has been inactivated. This redistribution will not cause the overall payment amount to change, but it will affect the amount that is spread across each loan.
We recommend updating the inactive date once the employee receives final compensation for the plan. This ensures the employee doesn't receive additional pay after reaching their goal.
Example
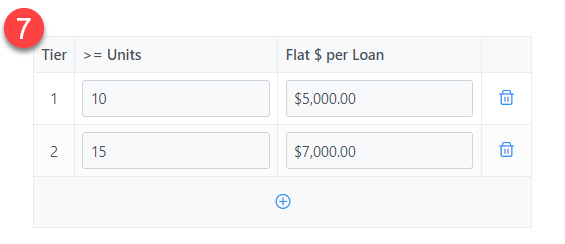
Nathan Newbie recently started at the company on March 1st. He has an initial goal of completing 10 loans in his first year. Upon reaching that goal, he will receive a bonus of $5,000. If he goes above and beyond and reaches 15 loans completed in the year, his bonus will be $7,000.
To set up this plan:
-
Create a new incentive plan with the Payment Timing set to "18 Month Rolling per Payroll Period Stop Date (Vol per 18 Months; Pay per Payroll Period)". This payment timing allows for periods up to the full 18 months, but we'll only use it for Nathan's first year.
-
Set the Loan Eligibility Date and Payable On Date to both be "Completed".
-
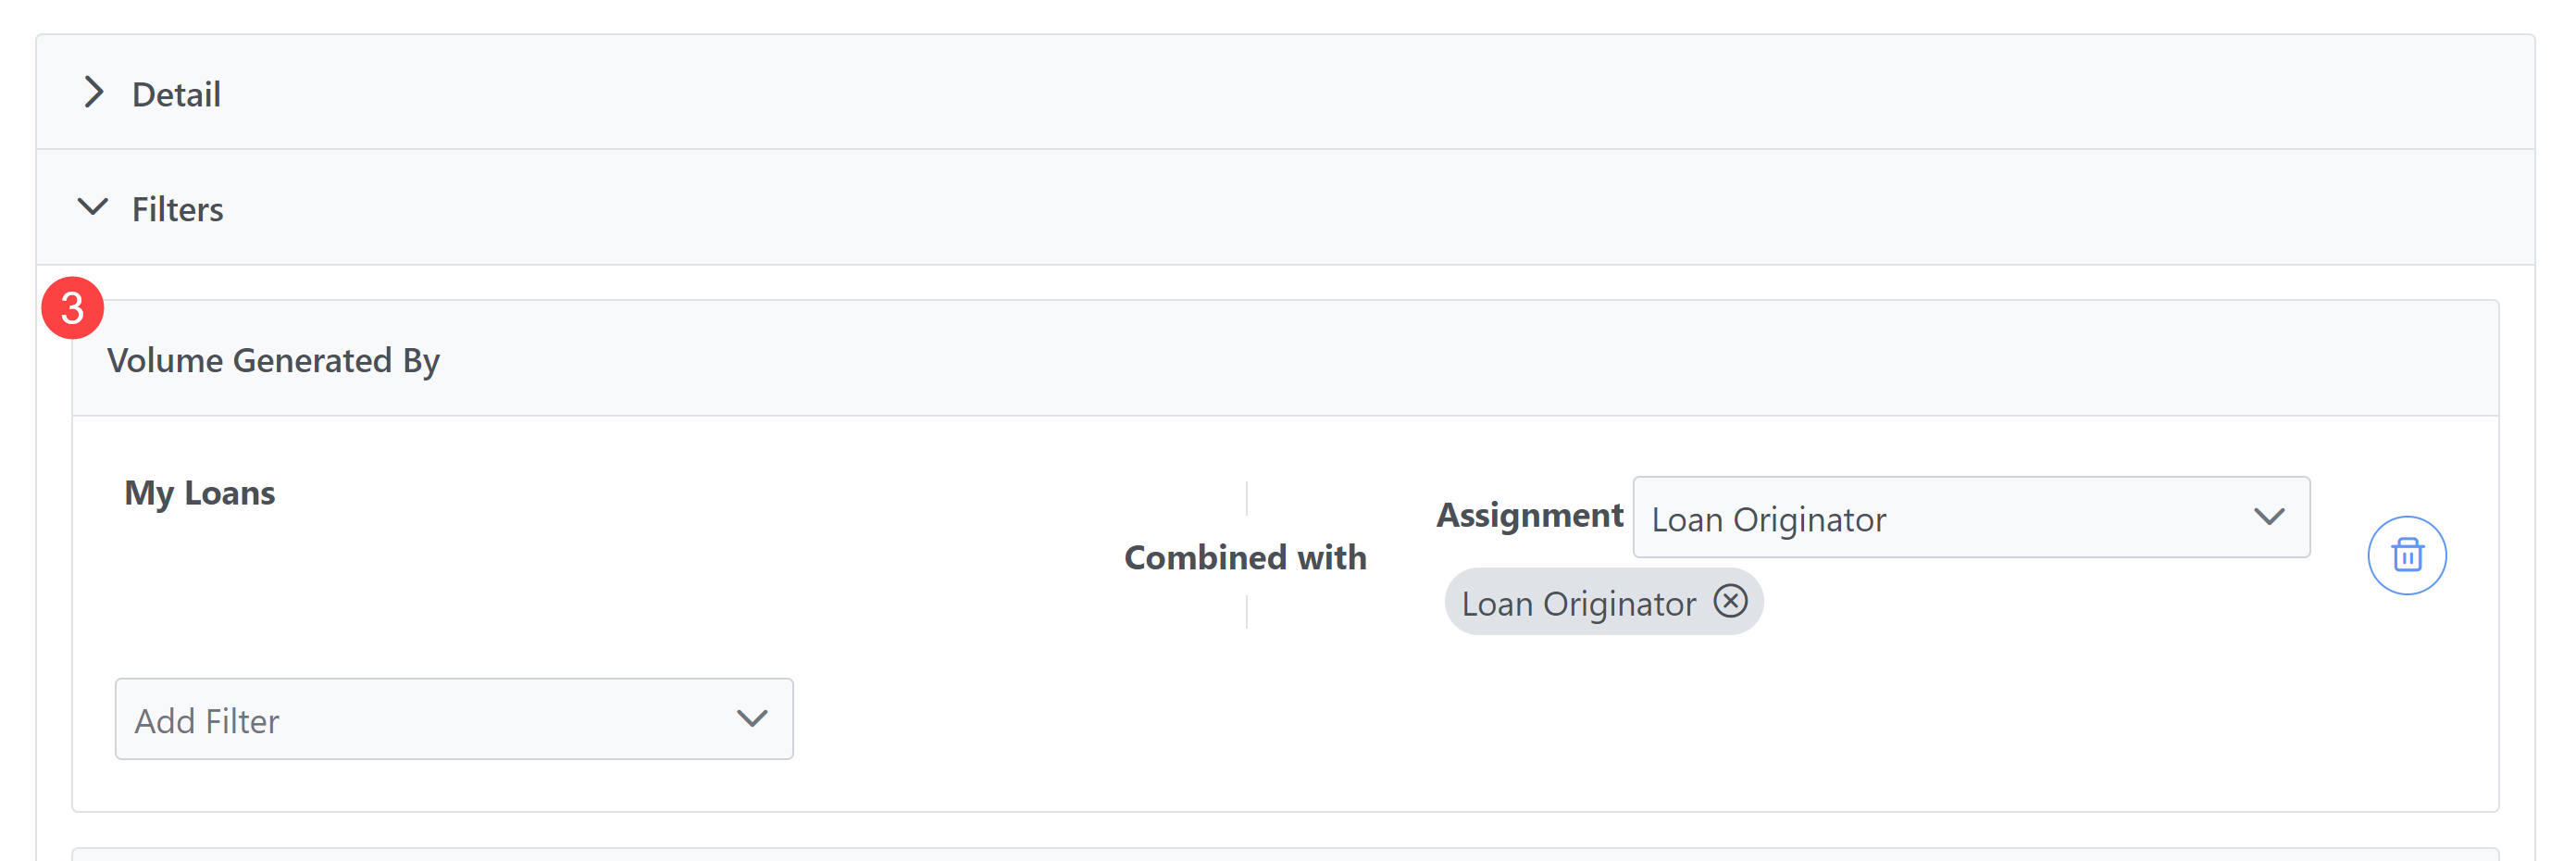
Set the filters to filter only for loans where the employee assigned the plan is the Loan Originator. This can be done by adding a "My Loans + Assignment" filter with the Assignment "Loan Originator".
-
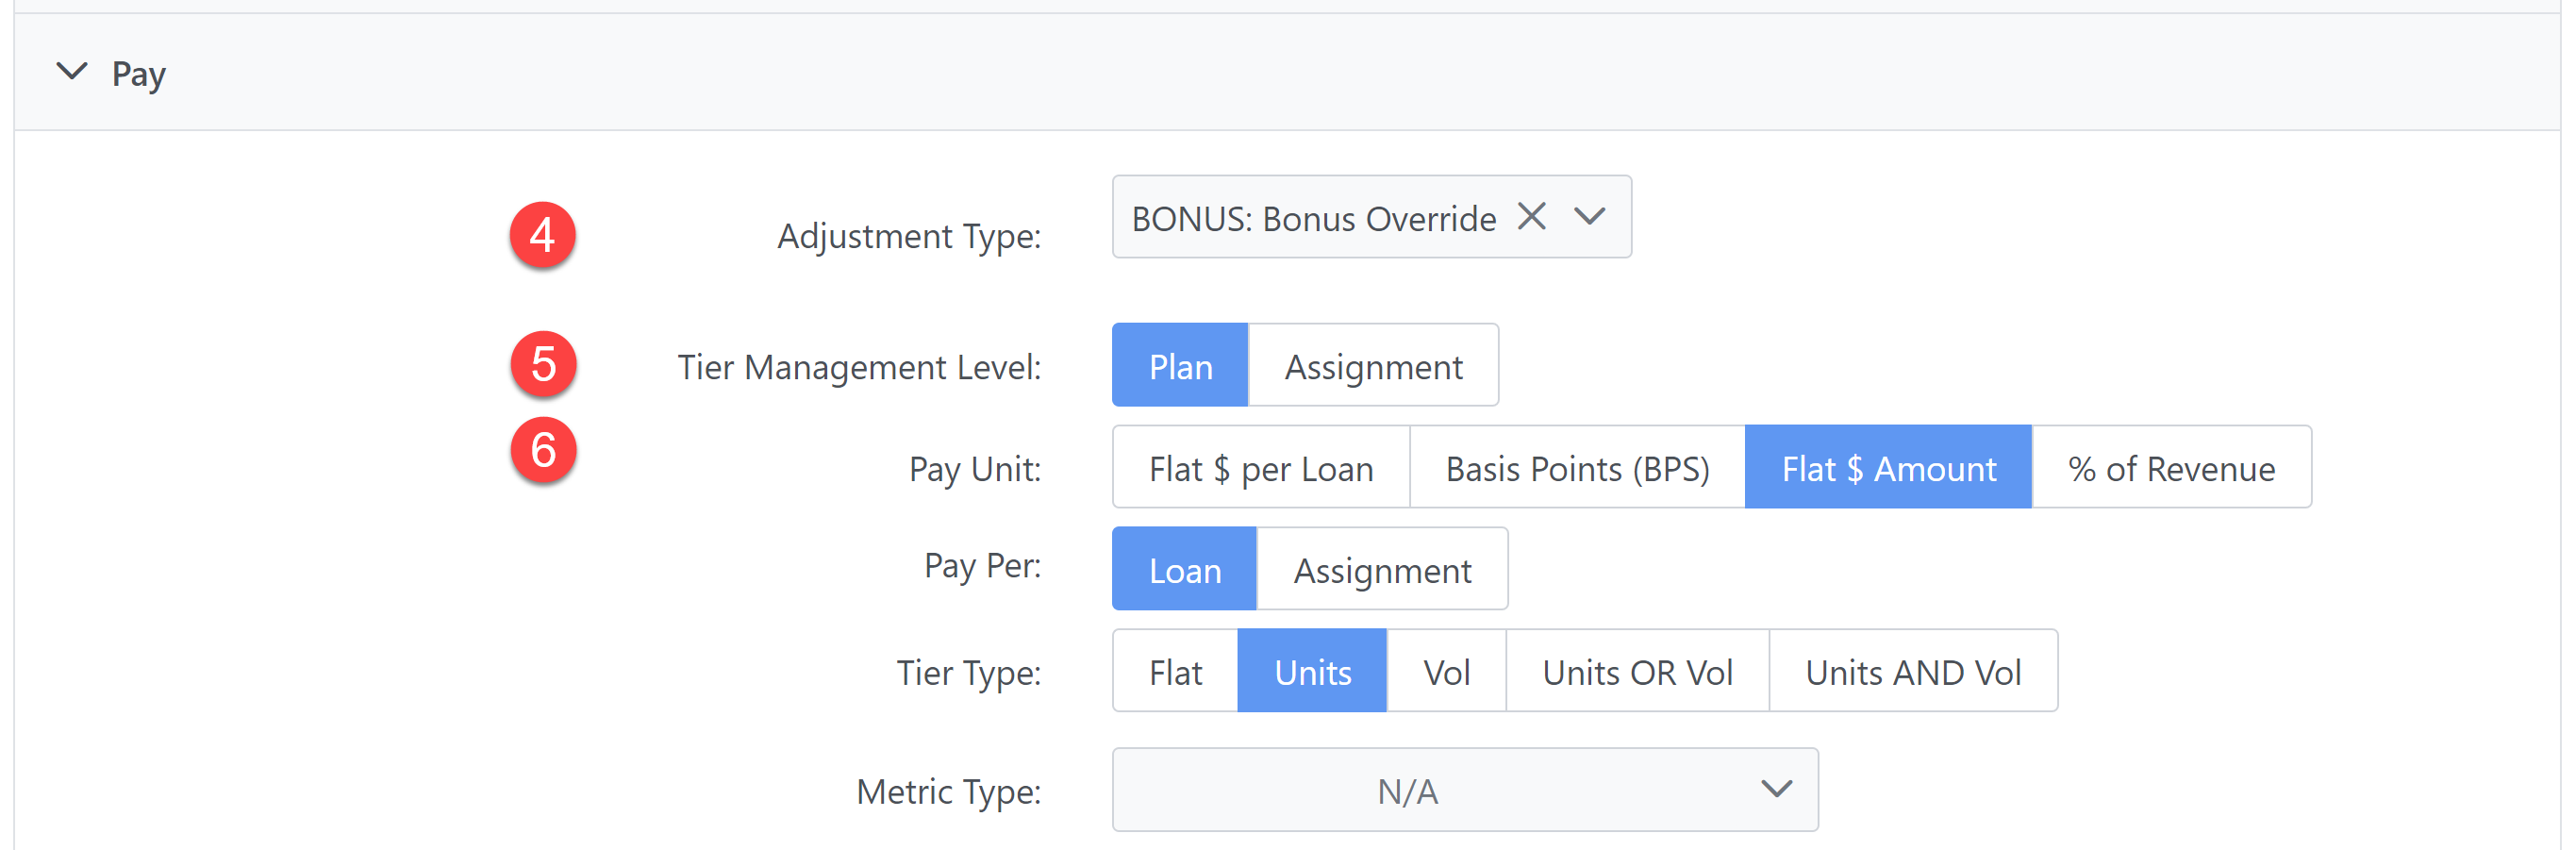
Set the Adjustment Type to "BONUS: Bonus Override".
-
For this example, select "Plan" for the Tier Management Level. For more information on the Tier Management Levels, see Create or Edit Incentive Plans.
-
Set the Pay Unit to "Flat $ Amount", Pay Per to "Loan", and Tier Type to "Units".
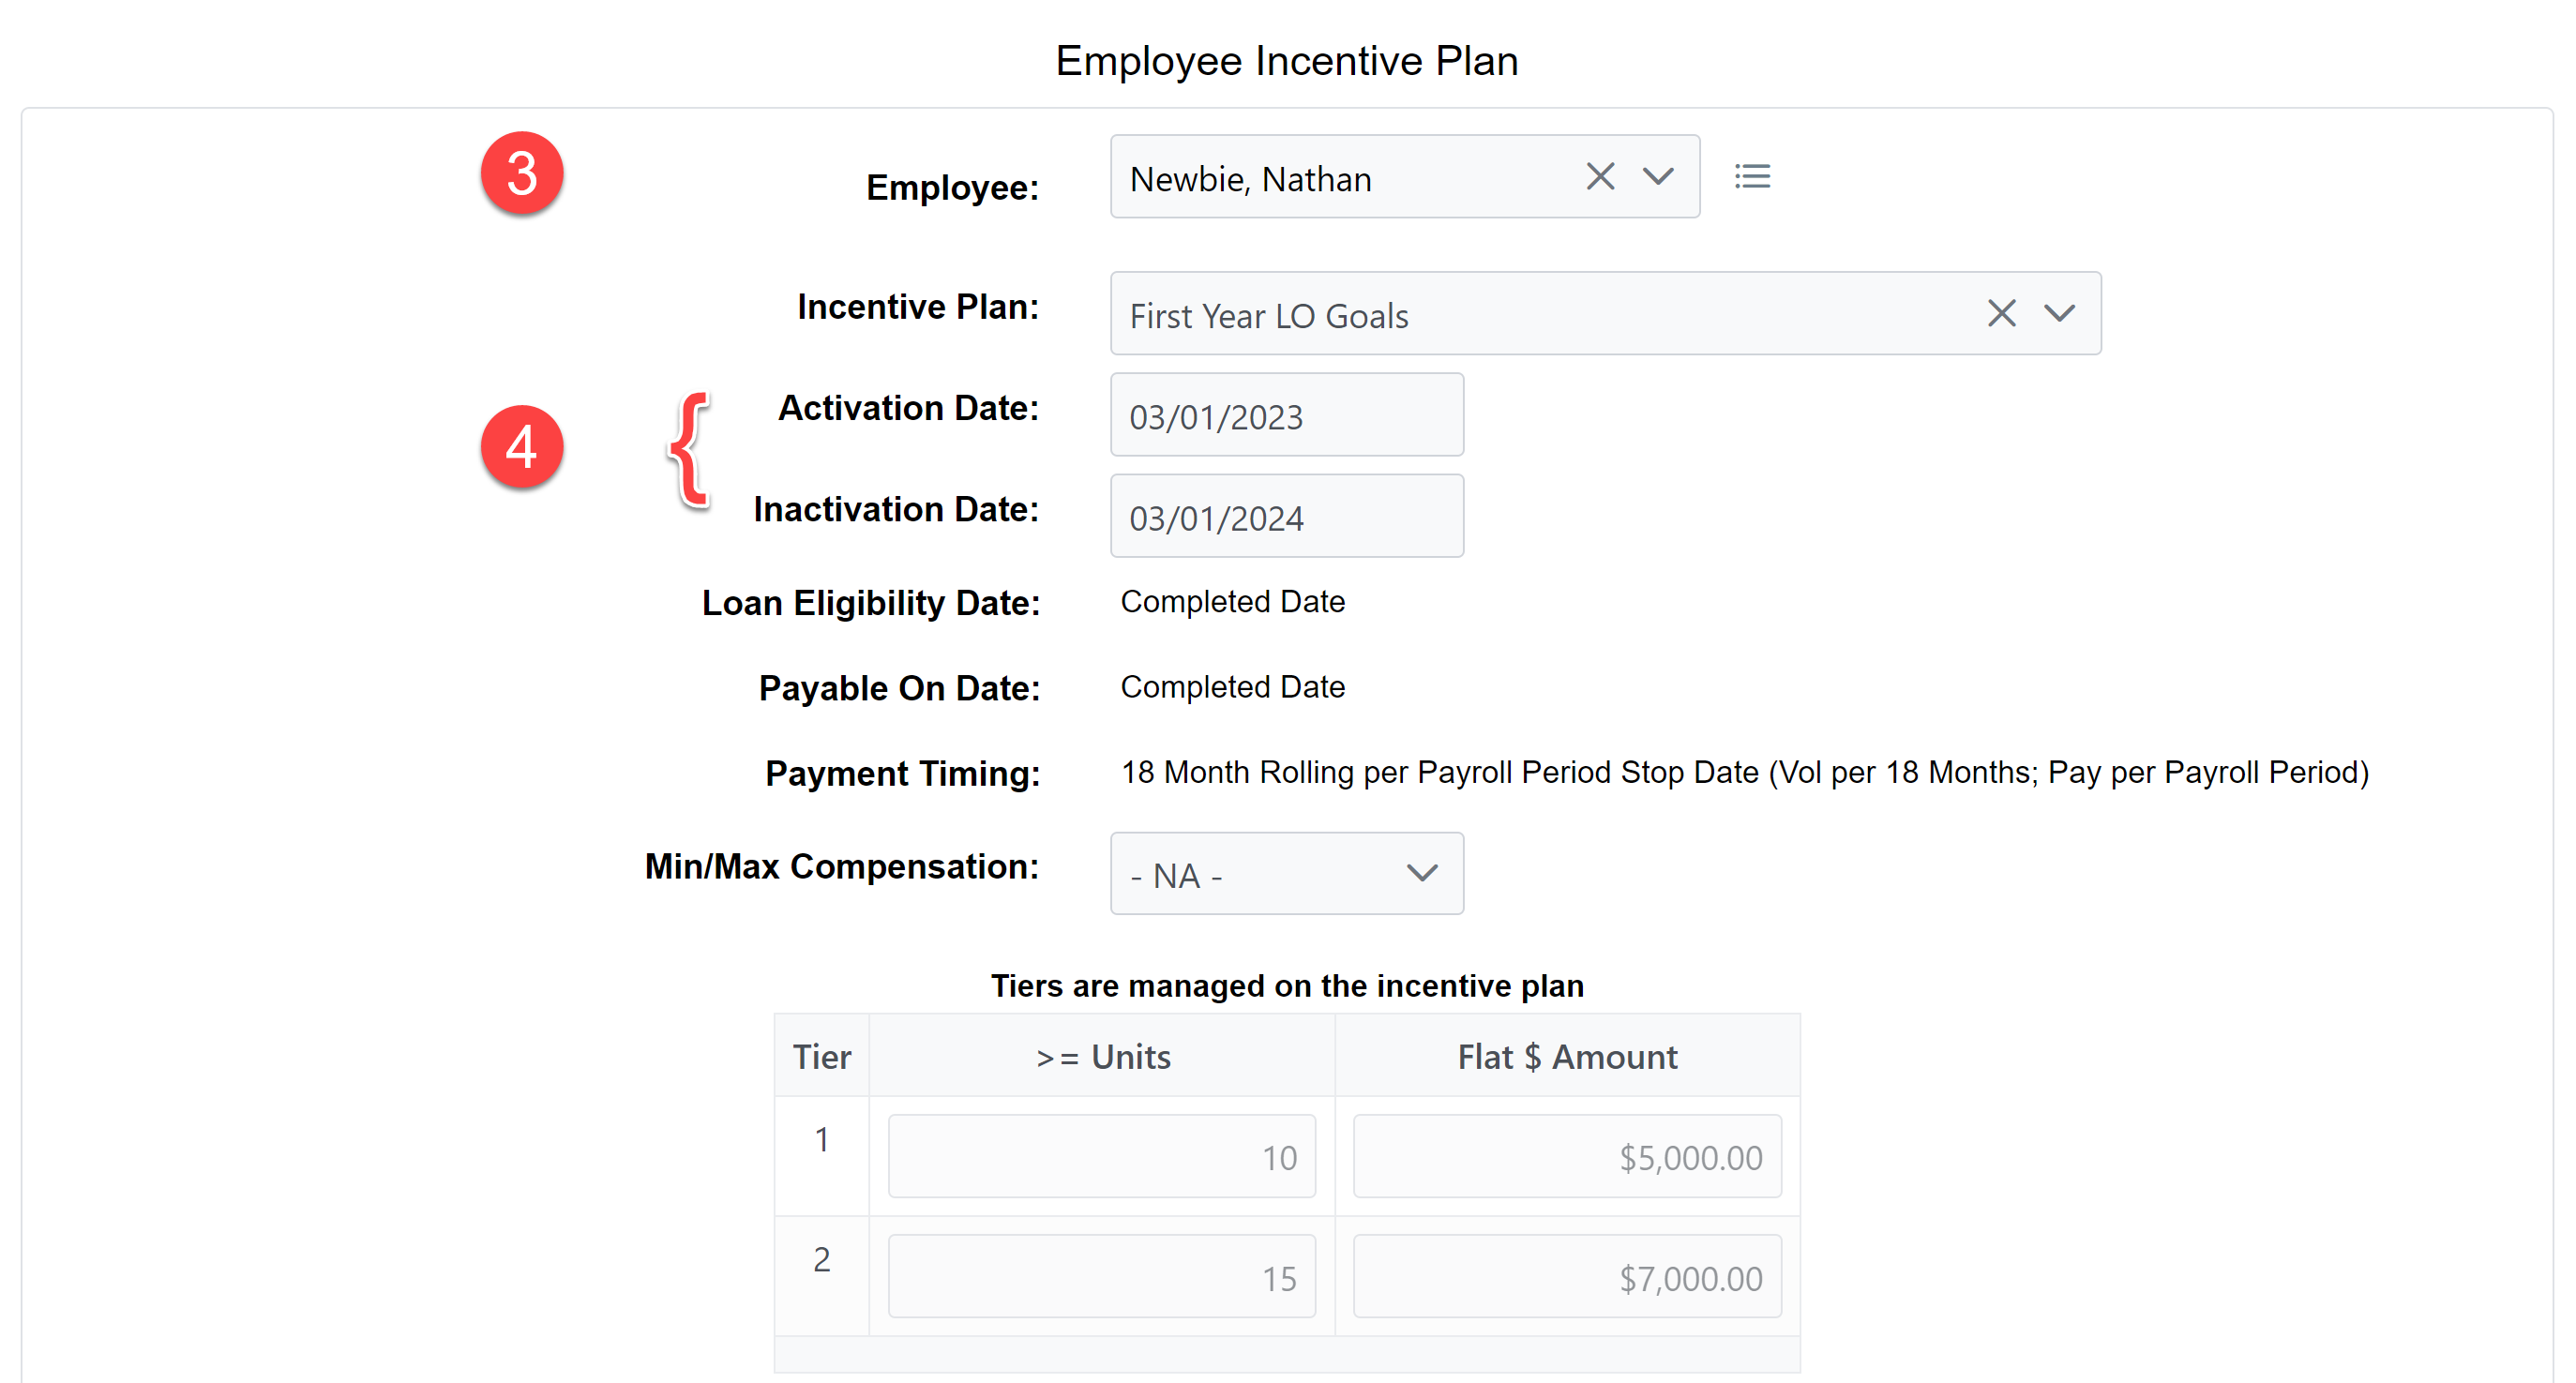
- Set the Tiers as follows:
- Save the incentive plan.
To assign this plan:
-
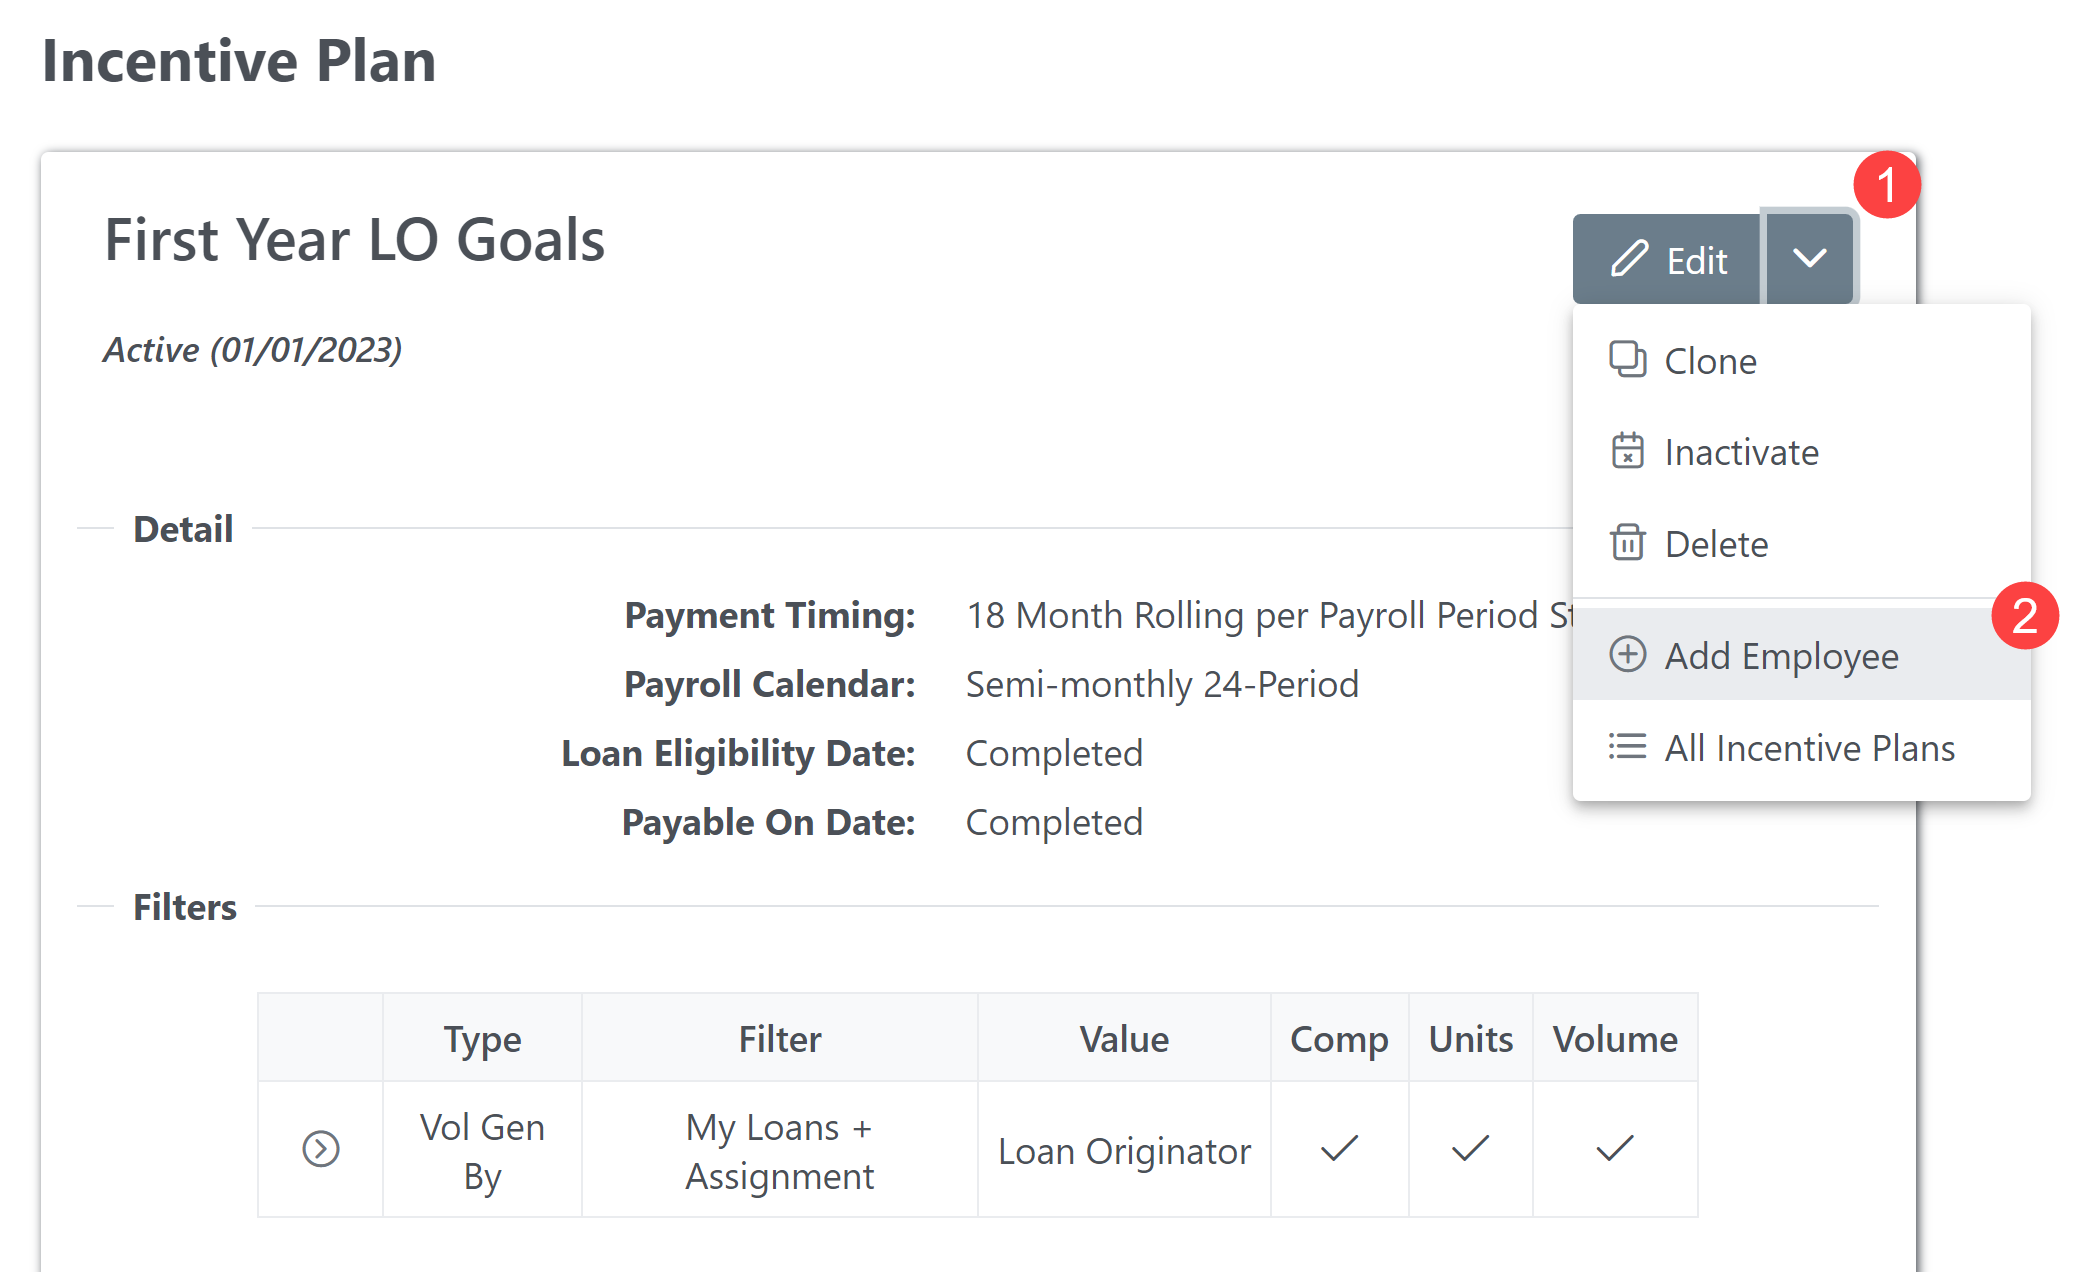
Click the arrow next to the "Edit" button.
-
Click "Add Employee".
-
In the Employee dropdown, select "Newbie, Nathan".
-
Set the Activation Date to "03/01/2023", and the Inactivation Date to a year after that, "03/01/2024".
-
Save the assignment.
During the payroll reconciliation process, it is determined that Nathan reached his goal. His plan should be inactivated with the date he achieved the goal.
To inactivate this plan:
-
On the Comp Plan tab of Nathan's Employee Details page, click the pencil icon (
 ) next to the plan.
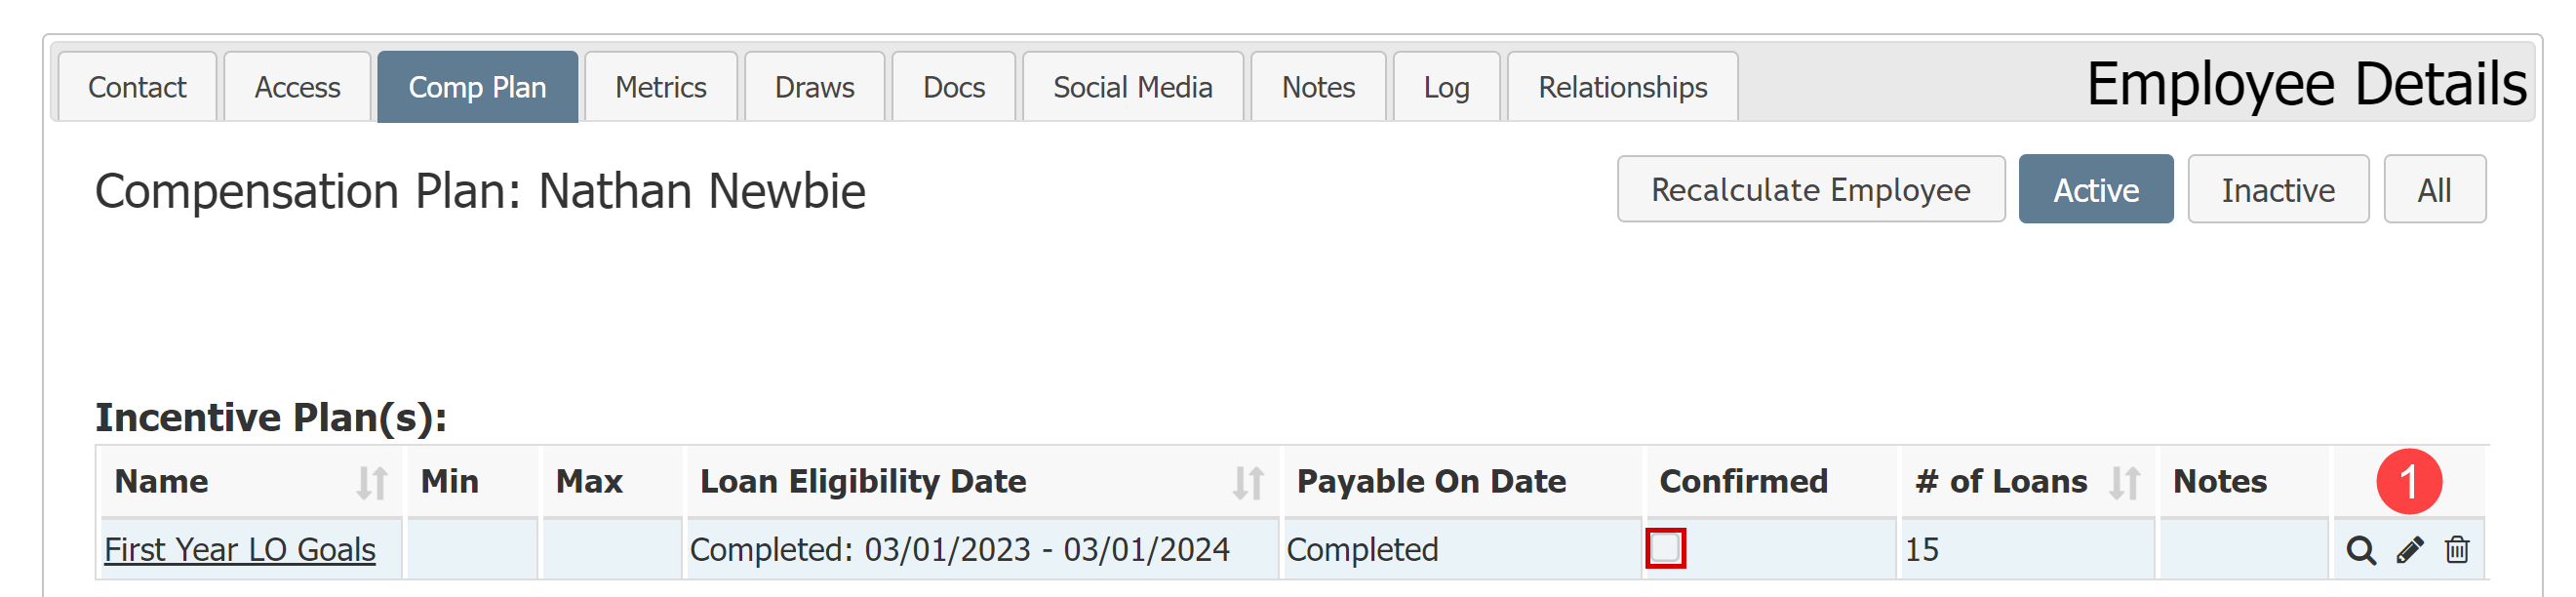
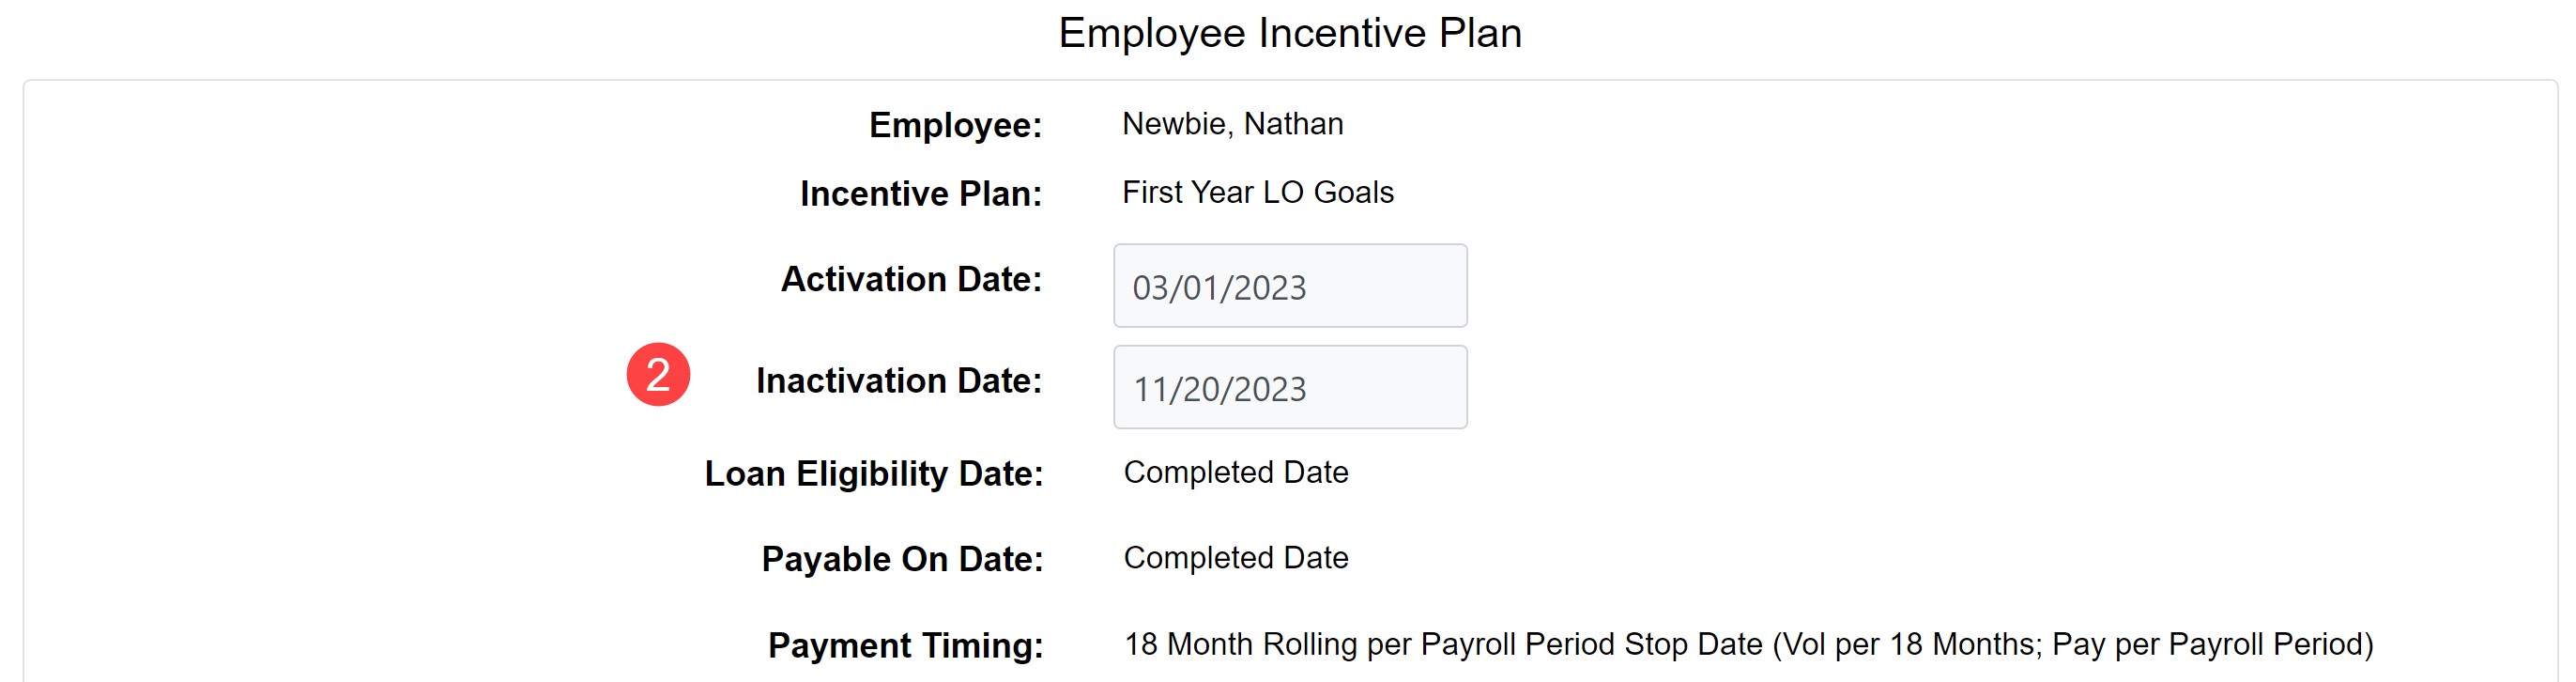
-
On this page, enter an Inactivation Date equal to when Nathan reached his target. In this case, that is "11/20/2023".
-
Save the assignment.
See Also: