Understand Held Pay
Held Pay is a feature within nCino Incentive Compensation that allows you to post transactions that do not pay out until the employee meets some condition. This article describes how the Held Pay feature works, how to create Held Pay transactions, as well as what options and reports are available.
Note: The Client Success team must enable Held Pay in your nCino Incentive Compensation site before it can be used. To enable this feature, contact https://incentivehelp.ncino.com/hc/en-us.
Overview
The Held Pay feature enables the creation of held adjustments, which are adjustments that do not immediately post to the current payroll period. After you create held adjustments, the system can hold them until the conditions you set, such as reaching a specific date. After it meets the conditions, the system releases and posts the held adjustment to the current payroll period. Admins can also set the adjustment to expire automatically after a certain date.
A typical held adjustment's lifecycle looks like this:
-
Users create held adjustments either from by uploading files, or in the + New Held Adjustment tool.
-
While they are outstanding, held adjustments are typically visible to the employee on their comp snapshot in the Held Balance section.
-
Admins can view and manage held adjustments using the Use the Held Adjustments Management Tool.
-
When it is time, an admin can approve, deny, expire, or delete outstanding held adjustments. Alternatively, held adjustments expire automatically upon reaching their expiration date.
Create a Held Adjustment
To enter or upload held adjustments, use the following standalone tools in the Corporate Payoll menu.
Enter a Held Adjustment
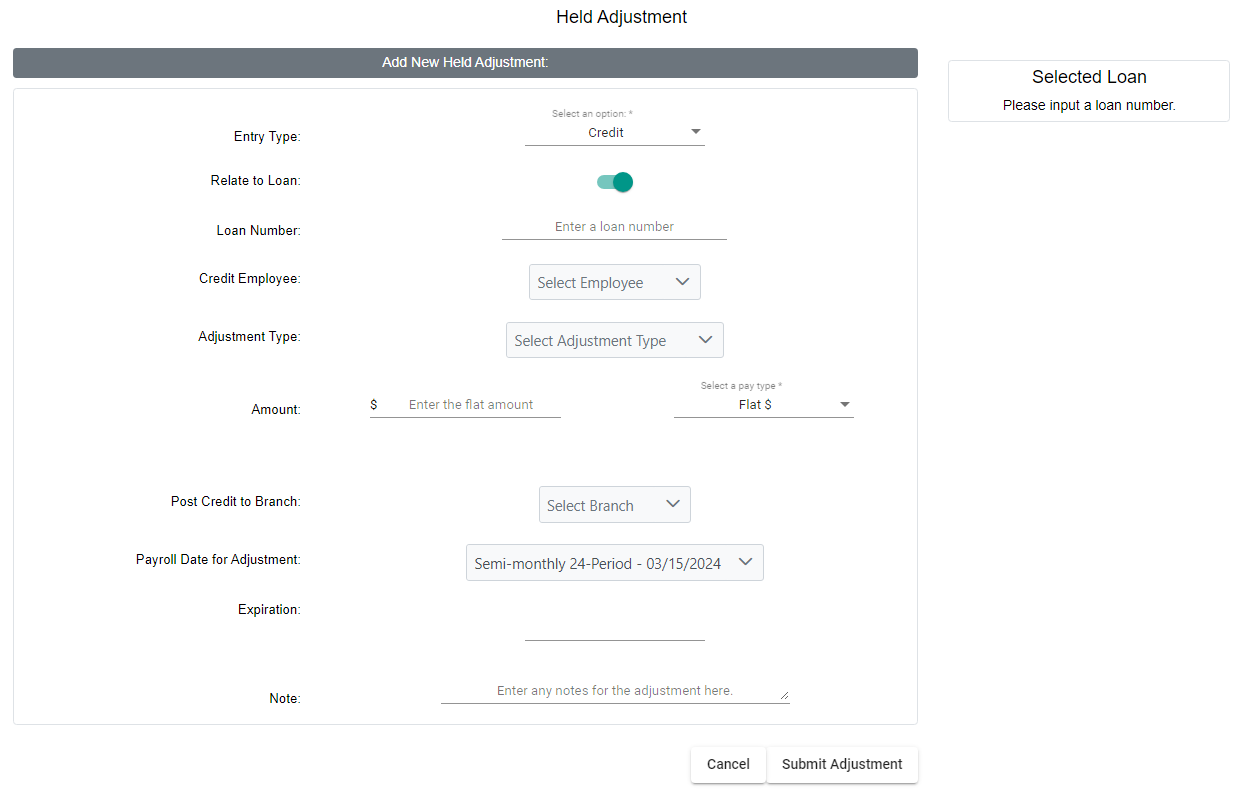
To access the Add New Held Adjustment tool, from the nCino Incentive Compensation menu, click Payroll ▼ > + New Held Adjustment. This tool is identical to the Manual Adjustment tool, but with the addition of the Expiration field that an admin can use to set an expiration date for the adjustment.
See also Manual Adjustment Tool Overview.
Upload Held Adjustments
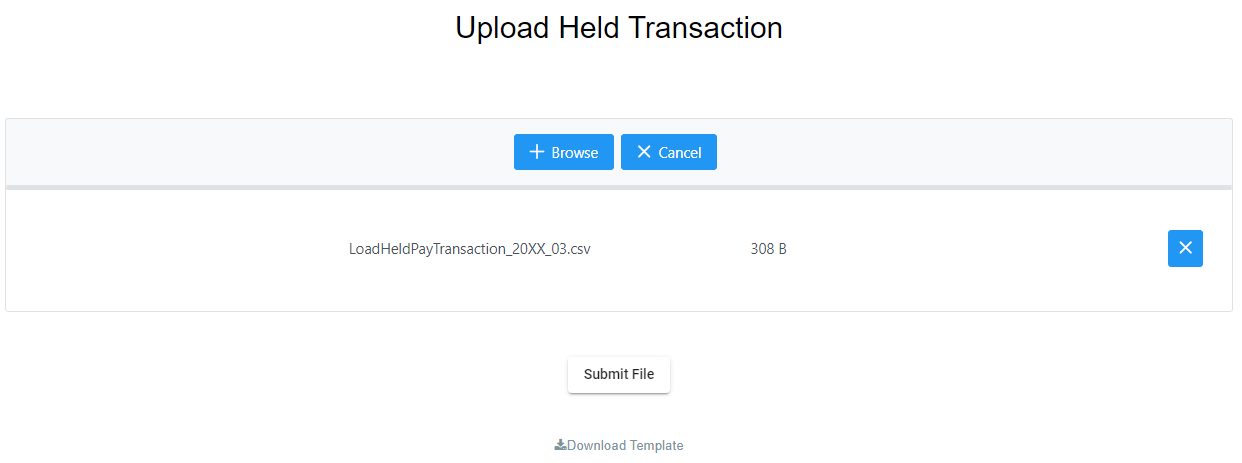
To access the Upload Help Payroll Adjustments tool, from the nCino Incentive Compensation menu, click Payroll ▼ > Corp Payroll Menu > Transactions section > Upload Held Payroll Adjustments. The process to upload held adjustments is similar to that of uploading manual adjustments, but with one difference: the held adjustments template has an additional Expiration field admins can use to set an expiration date for the adjustment.
See also Upload Credit/Debit Adjustments.
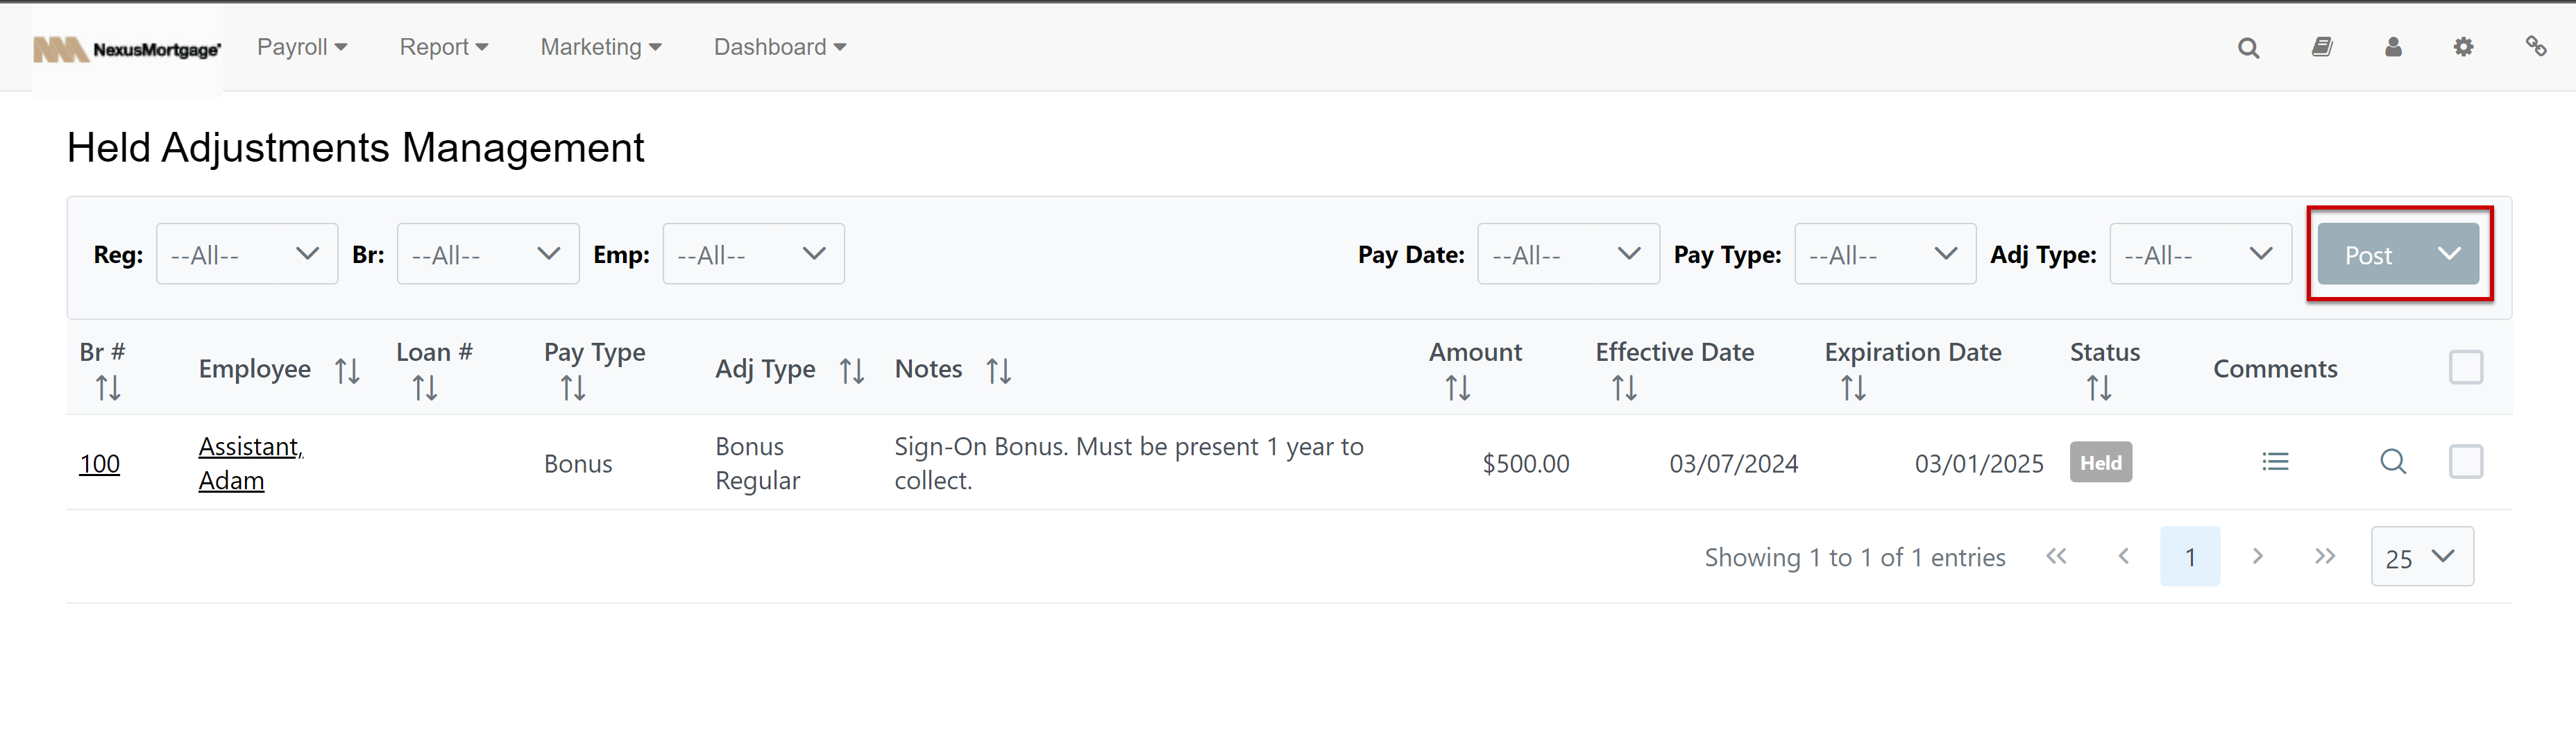
Use the Held Adjustments Management Tool
To access the Held Adjustments Management tool, from the nCino Incentive Compensation menu, click Payroll ▼ > Held Adjustments. Admins can use this tool to manually post, expire, or delete held adjustments by clicking the check box next to the adjustment, and using the button and dropdown.
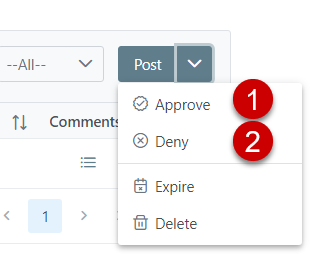
The Enable Initial Approval setting allows you to see and use the Approve (1) and Deny (2) options.
For more information, see Held Pay Settings.
Held Pay Settings
To access the Held Pay Settings screen, from the nCino Incentive Compensation menu, click Gear Icon ( ) > System Admin > Company Profile section > Held Pay Settings. This screen contains many settings that control how held pay behaves.
Settings include:
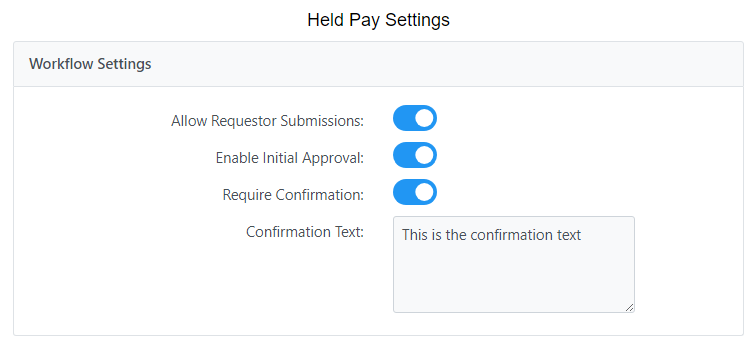
Workflow Settings:
-
Allow Requestor Submissions: When enabled, users can submit their own requests for held pay.
-
Causes Enable Initial Approval option and Authorized Users section to be visible.
-
-
Enable Initial Approval: When enabled, held pay requests must be approved by the requestor's manager before they are posted.
- Visible when Allow Requestor Submissions is enabled.
-
Require Confirmation: When enabled, a confirmation window appears when attempting to save a held adjustment that the user must confirm. Text entered for this setting appears in the confirmation window.
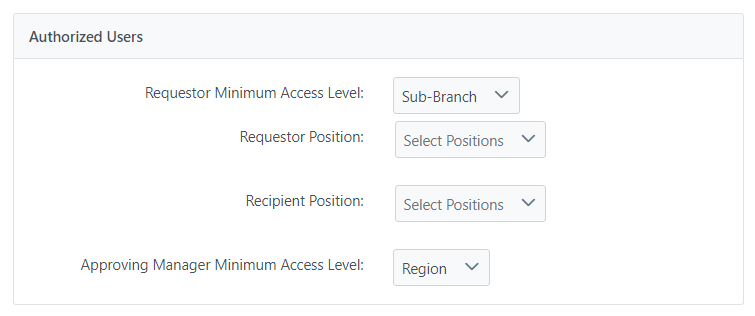
Authorized Users: Section is visible when Allow Requestor Submissions is enabled.
-
Requestor Minimum Access Level: Minimum access level a user must have to be able to request held pay.
-
Requestor Position: Position a user must have to be able to request held pay. You can select multiple positions.
-
Recipient Position: Position a user must have to be selected as the recipient of held pay. Multiple positions can be selected.
-
Approving Manager Minimum Access Level: Minimum access level a user must have to approve held pay requests for users they manage.
-
Visible when Enable Initial Approval is enabled.
-
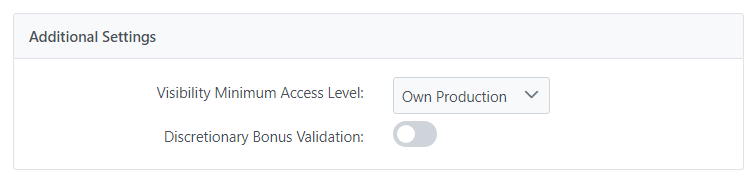
Additional Settings:
-
Visibility Minimum Access Level: Minimum access level a user must have to see their outstanding held pay.
-
Discretionary Bonus Validation: When enabled, discretionary bonuses cannot be created if their amount exceeds 10% of the employee's net pay.
See Also: